Hey folks,
So this post will continue the talk about the bent lamination process I used to create the rams horn style handle for the bicycle. Like you all read in the previous post the mold has been created, now it's time to show you all how to cut the thin strips to create the laminations. The first thing I did was create a jig that will allow me to cut a constant 1/8 inch strip of material.
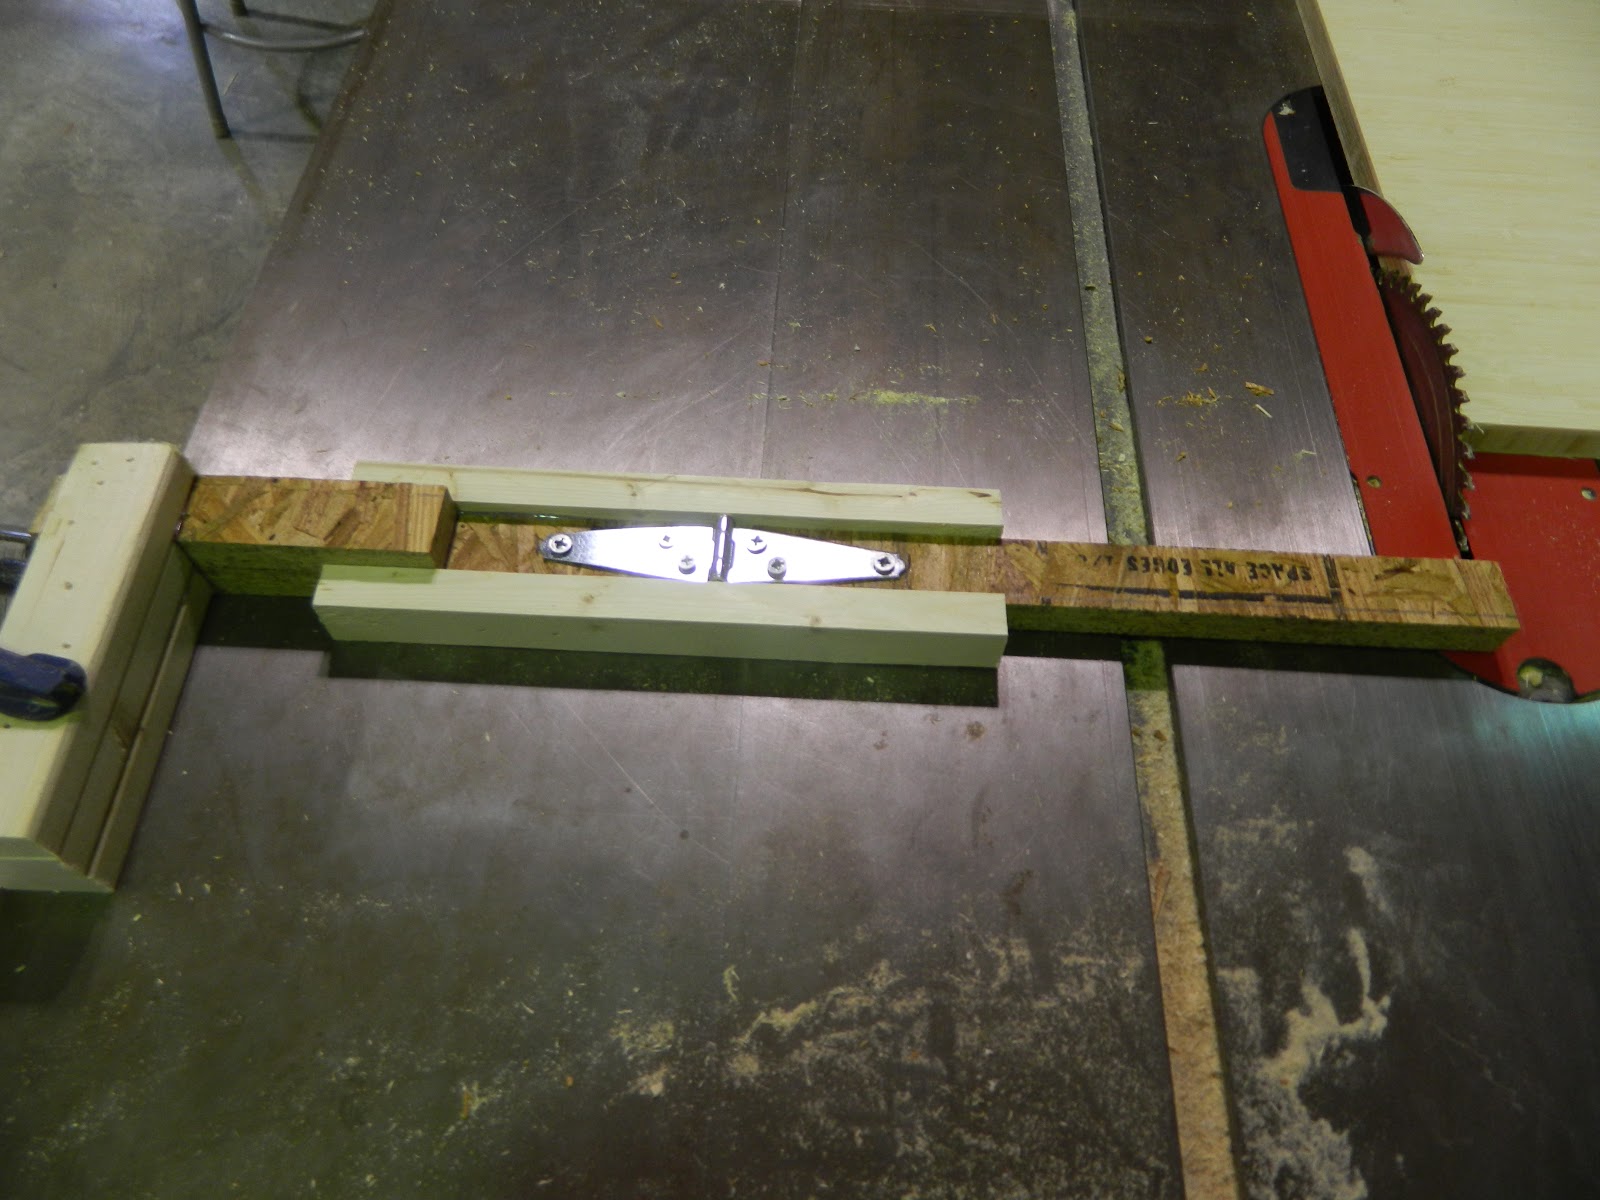
So here is the jig, its pretty neat because it clamps to the table of the table saw, and then moves out of the way when you want to make your cut. Again, like I said the jig uses the table saw fence to allow a material to be cut into a consistent strip to allow bending.
As you can see in the first picture, the jig fold out of the way just like I said, and makes a consistent strip of 1/8. The next process is the actual process of bending the material. I couldn't take pictures of the process because it involves gluing, but I will put a link to show the process below.
Bent Lamination Process
-Nick
Watch the process of crafting a Plyboo bicycle from raw materials to a finished product.
Sunday, March 10, 2013
Friday, March 8, 2013
So Much To Talk About
Hey All,
So I know that I have really been slacking with the whole posting on the blog, but this might be the best post yet! Gotta keep you reading, hahahaha =). Anyways, like the title says there really is so much to talk about!!! A couple post back I talked about having all my bike parts in, well one package got lost on campus, which caused work on the bike to basically come to a stand still, but don't worry, after a lot of e-mailing and communicating with individuals on campus, THE PACKAGE WAS FOUND!!! But lets talk about the other stuff that has happened since the last post, 1. Gluing test with the marine grade epoxy 2. Plyboo handle bar build (really cool process)
First the gluing test, below you will see a picture of the epoxy that I am using. I have to say the guys at AeroMarine have a really cool product. The resin to hardener is 2 to 1 which was pretty strange, most of the stuff I use is usually a 1 to 1 ratio.
The next picture is just a couple of scape pieces of Plyboo that I epoxied together, the epoxy dried clear just as the bottle said, again a wonderful product, but very messy!!
The next topic that I will talk about deals with the handle bars, and the process of bent laminations. I have to say these are going to be way cool! So the first step in any bent lamination process is building the mold, the pictures below deal with the drawing out of the mold on a scrap piece of plywood that was in one of the scrape tubes in the shop.
Like I said I began with drawing the mold out, to figure out how wide the handle bars needed to be I acted like I was holding handle bars in front of me, and I had someone measure the distance between my knuckles to get the inside dimension of the bars. To get the curve of the bars I used the closest thing to me that was round, I used a roll of wire, and placed it on the spot where the two line intersected and drew the curve.
As you can see I marked on the cardboard so that I would get the same curve on the other side, making exactly symmetrical handle bars. Next comes the step dealing with building of the mold. I cut a scrape 2 by 4 I had saved from an old pallet I took apart into 2 to 3 inch blocks. Then wrapped them in plastic so that the then lamination wouldn't stick.
You then drill holes into the plywood drawing to attach the blocks to hold the lamination during the gluing process.
You then counter sink the holes so that the screws holding the blocks set flush against the bottom of the plywood mold.
I then used a hot glue gun to hold down the blocks while screwing them to the plywood mold.
I also used a clamp to hold down the blocks, and finally the last picture is the completed mold. The bent lamination process will continue in the next post!
-Nick
So I know that I have really been slacking with the whole posting on the blog, but this might be the best post yet! Gotta keep you reading, hahahaha =). Anyways, like the title says there really is so much to talk about!!! A couple post back I talked about having all my bike parts in, well one package got lost on campus, which caused work on the bike to basically come to a stand still, but don't worry, after a lot of e-mailing and communicating with individuals on campus, THE PACKAGE WAS FOUND!!! But lets talk about the other stuff that has happened since the last post, 1. Gluing test with the marine grade epoxy 2. Plyboo handle bar build (really cool process)
Like I said I began with drawing the mold out, to figure out how wide the handle bars needed to be I acted like I was holding handle bars in front of me, and I had someone measure the distance between my knuckles to get the inside dimension of the bars. To get the curve of the bars I used the closest thing to me that was round, I used a roll of wire, and placed it on the spot where the two line intersected and drew the curve.
As you can see I marked on the cardboard so that I would get the same curve on the other side, making exactly symmetrical handle bars. Next comes the step dealing with building of the mold. I cut a scrape 2 by 4 I had saved from an old pallet I took apart into 2 to 3 inch blocks. Then wrapped them in plastic so that the then lamination wouldn't stick.
You then drill holes into the plywood drawing to attach the blocks to hold the lamination during the gluing process.
You then counter sink the holes so that the screws holding the blocks set flush against the bottom of the plywood mold.
I also used a clamp to hold down the blocks, and finally the last picture is the completed mold. The bent lamination process will continue in the next post!
-Nick
Rear Stay and Dropouts
Over the past couple days I have been working on the rear stays and dropouts. I have also been testing the Plyboo to see if it was strong enough to hold the weight of a person while riding the bicycle.
| Just making a full scale mockup |
| 3 dimensional mock up |
So that is where the bike is now, just gotta catch up on the is blogging!! Stay tuned to see what will happen next.
-Nick
-Nick
Thursday, February 28, 2013
Insetting Headstock
Hey folks,
I know it has been awhile since my last posting, it has been hectic around here. So this post will be about insetting the headstock that I welded earlier in the project. I have also been up to a lot of test, lets just say Plyboo bent laminations. Below are some pictures of the process:
| Here is the amount that will be taken off each piece |
| I then set up a router and cut the shape into each side of the Plyboo sheet |
I dont have a picture of what the pieces looked like after completed, but they looked great!
Until next time,
-Nick
Monday, February 18, 2013
Lots To Talk About!!!
| 2 Plyboo Sheets |
| It is kind of hard to see, but I traced the pieces out from the template |
So there is the overall shape of the bike, I think it looks pretty neat. After the initial cutting out I next started to lighten the inside pieces of the frame.
As you can see I cut holes into the frame to lighten up the material so the bike wasn't so heavy.
Last, I cut the center out of the frame. Also, you can see that I cut off the the spot where the seat post will mount to the bike, I will insert it into the frame itself.
So, you can see that I got a lot done. I also got news that my actual bike parts are in, so tomorrow will be a really interesting post. Until tomorrow, have a good one!
-Nick
Monday, February 11, 2013
Parts Have Arrived!
Hi All,
Today has been a very exciting day, parts have arrived and building has began! Whoop whoop! In all seriousness it is great to finally get building. The parts from Paragon Machine Works came in and they are awesome. The headstock and rear dropouts are perfect. Kudos to those guys for making great stuff.
I next laid out the template of the bicycle frame and then the headstock at the correct angle.
I then traced out the frame again on some melamine and there is my metal plate template that will be inserted into the frame.
I was then read to cut out the shape out of metal. This is were things got fun, i went over to the metal shop and found some scrape 3/8" metal and started cutting it out. I have to say it is a blast cutting and grinding metal.
So after about 45 minutes or so I can up with this.
After some work with a hand file the burs were gone and it was now time for welding.
Not the best welding job, but it is together. Tomorrow I will work on the connection a little more and it should be sturdy and ready to be epoxied inside the frame when the material gets here. Until then its another day of waiting.
- Nick
Friday, February 8, 2013
Logo Design
Hi All,
So just a few more days and all my material should be in my hands. Though with all this down time I asked my sister ( a wonderful graphic designer ) to come up with a logo for the project, but also some really cool promotion for her. Here is the logo:
What do you think?
-Nick
So just a few more days and all my material should be in my hands. Though with all this down time I asked my sister ( a wonderful graphic designer ) to come up with a logo for the project, but also some really cool promotion for her. Here is the logo:
What do you think?
-Nick
Subscribe to:
Posts (Atom)
